Friday, August 11, 2006
Revit's Drafting Machine
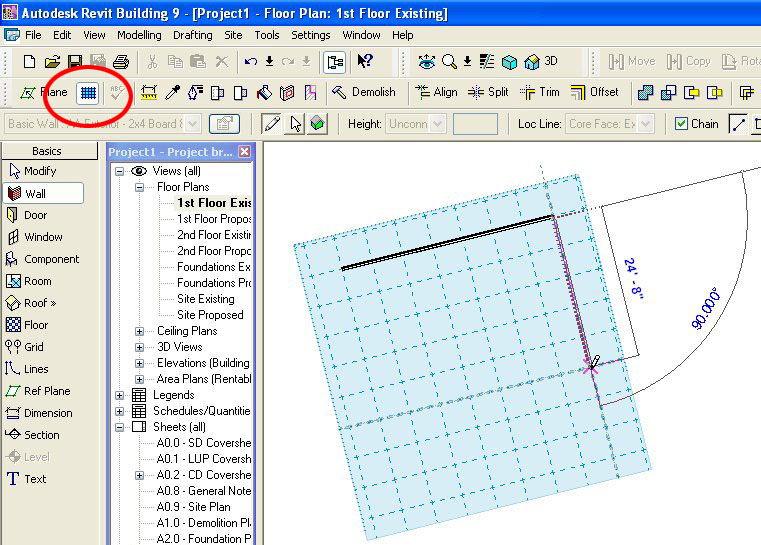
Overlooked by many beginners... For those of you who remember using drafting machines mounted to a drafting table you'll find a similar tool in Revit. Just turn on your Workplane (blue grid icon), set the spacing of its grid, and rotate the workplane to any angle you wish. Now any lines or walls that you draft will snap to the gridlines of your workplane. I recommend you use this feature if a wing of your building is not orthogonal.


Thursday, August 10, 2006
A few interesting features
1. Draw an arc (wall or line doesn't matter). Goto its properties and you can check "Center Mark Visible" if you need to dimension to the center point of an arc.
2. Callout a dimension and go to the dimensions properties... Edit/New... and play around with the Read Convention parameter. You'll notice you can now orient dimension text.
3. Shift + Nudge moves 10 times as far as Nudge.
4. Highlight Sheets (all) in your project browser. Now hold down Num Lock and press the Asterisk (*) key... or hold down Num Lock and press the minus (-) key. You'll notice the Sheets tree expands and collapses.
2. Callout a dimension and go to the dimensions properties... Edit/New... and play around with the Read Convention parameter. You'll notice you can now orient dimension text.
3. Shift + Nudge moves 10 times as far as Nudge.
4. Highlight Sheets (all) in your project browser. Now hold down Num Lock and press the Asterisk (*) key... or hold down Num Lock and press the minus (-) key. You'll notice the Sheets tree expands and collapses.
Monday, August 07, 2006
Autodesk University Blog
For those of you interested in following events at Autodesk University 2006 Joseph Wurcher's blog is devoted to a behind-the-scenes look at this year's conference.
Thursday, August 03, 2006
Press + Drag
Do you ever accidentally drag a wall or other model object across the screen when you didn't intend to move it? That's probably because the Press + Drag option is checked in your options bar.
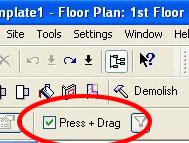
It might be nice if Revit would let you pick and choose which model and annotation objects can be moved with the Press + Drag option. I usually keep this checked for moving furniture, fixtures, and especially annotations but I do once in a while accidently drag walls or other model objects resulting in numberous warning messages.
Wednesday, August 02, 2006
Auto Dimension Options
Select the Dimension tool. In the options bar "Pick: Entire Walls" and select the "Options" button.
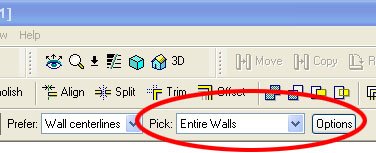
Select an exterior wall and you'll notice that you can now dimension the windows, doors, grids, and intersecting walls along the entire length of a wall.

Sunday, July 23, 2006
Rafters on Top Plate
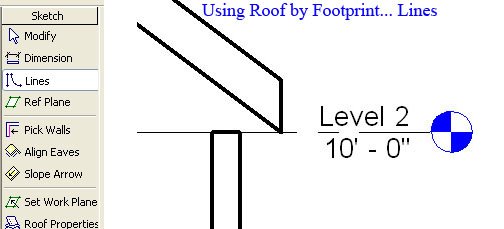
If you've sketched your roof using Lines in the Roof By Footprint mode you'll notice that your roof may not be resting on your top plate the way you would expect it to.
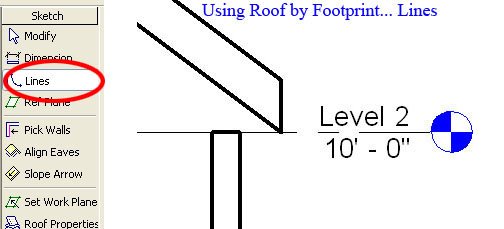
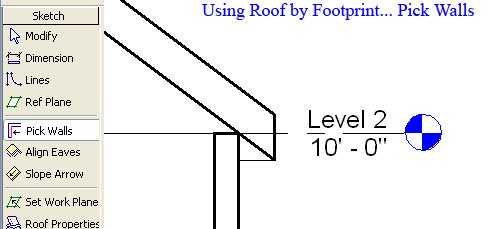
Instead of adjusting the elevation of your roof manually... sketch your roof using Pick Walls instead. The roof will now rest on your top plate (Level 2).
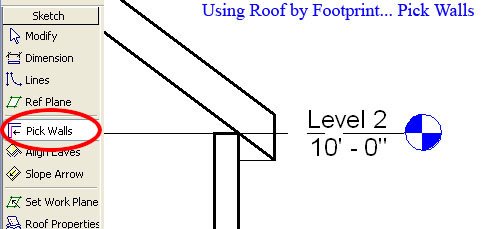
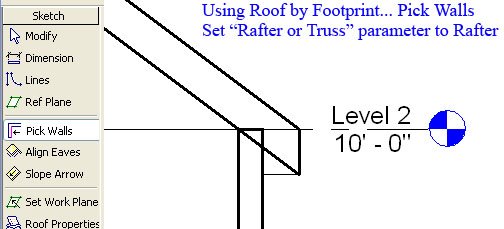
But by default Revit will treat your roof joists as trusses. To get your rafter resting precisely on your top plate you will have to go into the roof's properties and change the "Rafter or Truss" parameter to Rafter. This parameter will not be available if you've sketched your roof using Lines.
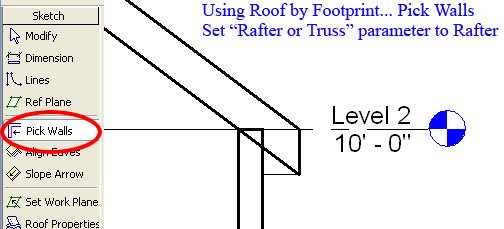
Understanding how Revit places a roof in section can be difficult if you're not aware of this Revit behavior.
UPDATE (12/05/06):
Don't mix pick lines and pick walls in the same roof sketch or you'll experience ill formed roofs.
Saturday, July 22, 2006
Stepped Foundation Plans
We often have split level projects and we've had a lot of trouble isolating the stem walls and footings from the rest of the model for use in a foundation plan... that is until Revit 9.0 came along. You can now use Revit Filters to isolate your foundation from the rest of your project.
1. Duplicate your Basic Wall: Foundation - 12" Concrete for each stem wall and footing size you need. You could use a Continuous Footing for your footings but we avoid Continuous Footings because their intersections don't clean up as nicely as Basic Walls.
2. Add the Type Comment "Foundations" for each of your new walls. Go to the wall's properties... Edit/New... Type Comments.
5. In Visibility/Graphics go to Model Categories and uncheck everything except Detail Items and Walls.
You can also use phases or worksets to isolate foundations, but we prefer the filter method.
1. Duplicate your Basic Wall: Foundation - 12" Concrete for each stem wall and footing size you need. You could use a Continuous Footing for your footings but we avoid Continuous Footings because their intersections don't clean up as nicely as Basic Walls.
2. Add the Type Comment "Foundations" for each of your new walls. Go to the wall's properties... Edit/New... Type Comments.

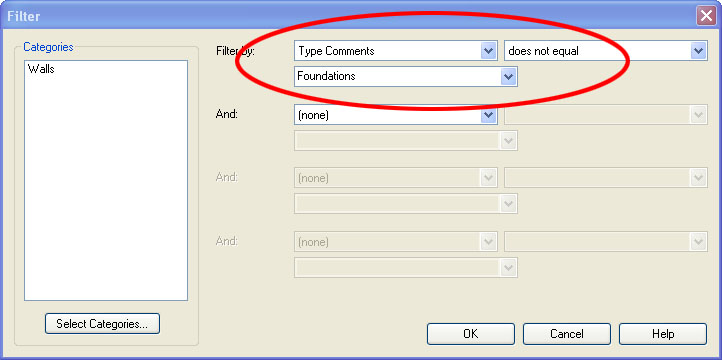
5. In Visibility/Graphics go to Model Categories and uncheck everything except Detail Items and Walls.

You can also use phases or worksets to isolate foundations, but we prefer the filter method.
Friday, July 21, 2006
Multiple Project Orientations
Lets say you have three buildings on your site and they are all at different angles. If you go to View Properties you'll notice that for orientation you only have a choice between Project North and True North, but what if you need to work in plan views that are orthagonal to each building?
Just setup duplicate floor plan views for each building and turn on your crop regions. Select the crop region and you can rotate the view to any angle you need. Because you've created duplicate views you can now preserve the different angles in each view for all time. Keep in mind, Revit will rotate your view in the opposite direction that you rotate your crop region.
Just setup duplicate floor plan views for each building and turn on your crop regions. Select the crop region and you can rotate the view to any angle you need. Because you've created duplicate views you can now preserve the different angles in each view for all time. Keep in mind, Revit will rotate your view in the opposite direction that you rotate your crop region.
Thursday, July 20, 2006
IFC/ODBC Software
I'm exploring Cost Estimating, Facilities Management, Specification Writers, and Material Takeoff softwares that utilize IFC and ODBC data that can be exported from Revit. I've added links to some of these softwares on my blog. Please feel free to comment if you have any experience using IFC or ODBC data exported from Revit.
Wednesday, July 19, 2006
Parametric Column Families
Have you tried everything and you can't get your column to stretch parametrically?
It can be a difficult task to figure out. There is no way to scale a column globally so that the proportions of your beautiful column are preserved (wishlist item alert) but we can show you how to build simpler columns that stretch properly.
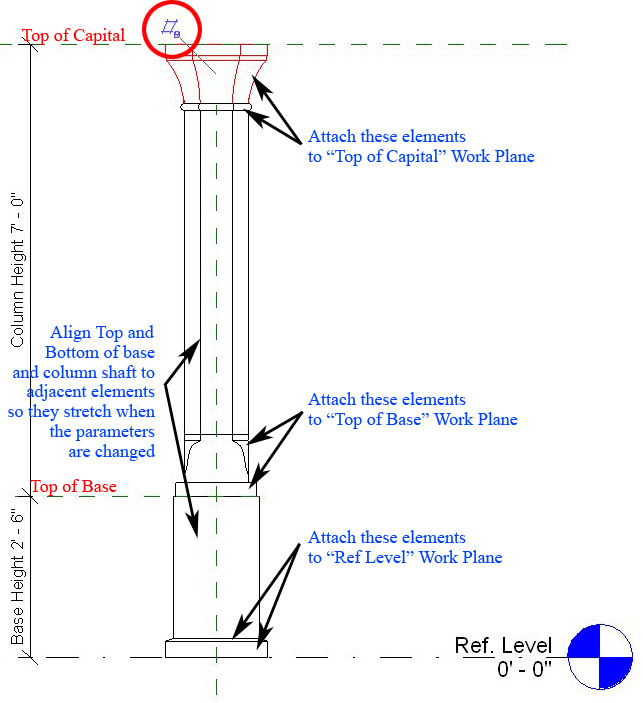
The example below is an adjustable column with adjustable base.
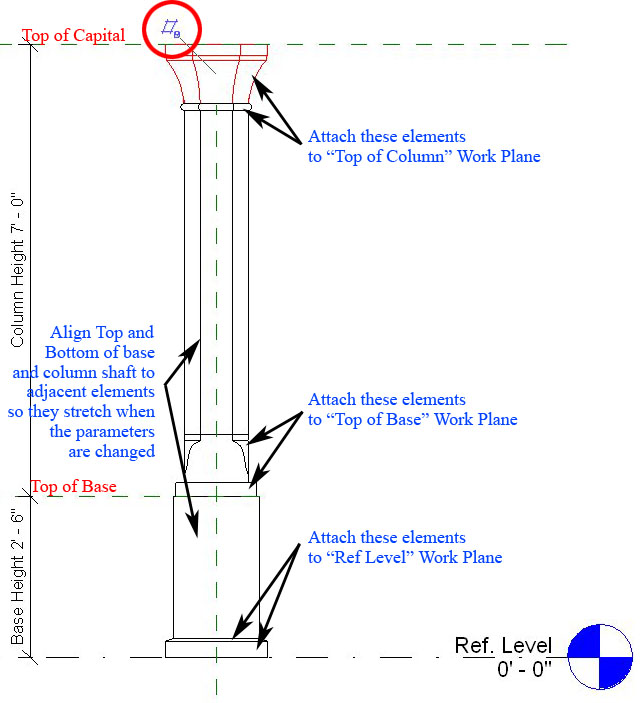
First thing you need to setup are reference planes. We have the given Ref Level and we've created a Top of Base and Top of Capital. Remember to goto the plane's properties and give each plane a unique name (we will use this later). Dimension these planes and attach your parameters (as shown below).
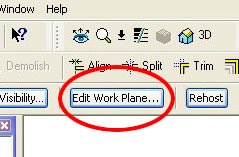
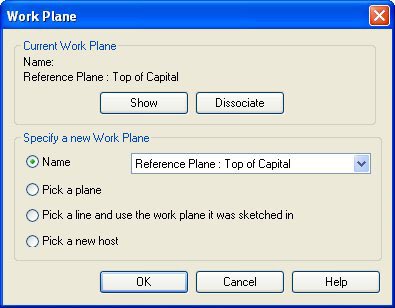
Second you have to create each of your elements for base and capital. Now the trick is that after you've created your elements you have to Edit the work plane of each element so that the elements are attached to the reference plane you would like them to "travel with." when adjusting the height parameters.
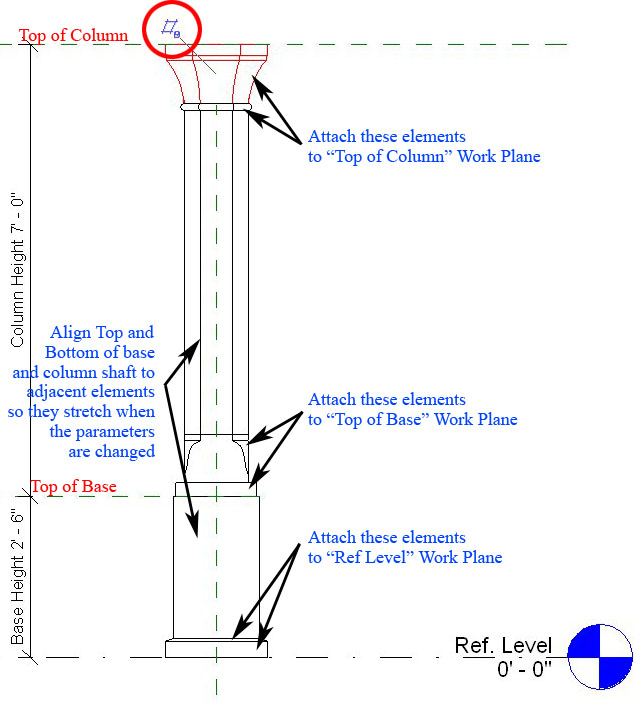
In this example we've attached our elements to Ref Level, Top of Base, and Top of Capital (as shown below).
It can be a difficult task to figure out. There is no way to scale a column globally so that the proportions of your beautiful column are preserved (wishlist item alert) but we can show you how to build simpler columns that stretch properly.
The example below is an adjustable column with adjustable base.
First thing you need to setup are reference planes. We have the given Ref Level and we've created a Top of Base and Top of Capital. Remember to goto the plane's properties and give each plane a unique name (we will use this later). Dimension these planes and attach your parameters (as shown below).
Second you have to create each of your elements for base and capital. Now the trick is that after you've created your elements you have to Edit the work plane of each element so that the elements are attached to the reference plane you would like them to "travel with." when adjusting the height parameters.
In this example we've attached our elements to Ref Level, Top of Base, and Top of Capital (as shown below).

Now load your column into a project and place it on the 1st and 2nd floors to make sure that the elements are correctly placed and stretch properly in both scenarios.
Subscribe to:
Posts (Atom)