Showing posts with label Topography. Show all posts

Wednesday, October 25, 2006

Linking building and site

This is the procedure we use for linking building and site.

1. Once you have your building(s) modelled start a new project... Import your survey(dwg) into the new project and generate your toposurface from your imported instance.
2. Link your building(s) into your new site model and adjust their elevation and orientation so they are properly located in the topography. Do not relocate your topography. The topography is probably already oriented to true north and you'll want to preserve this orientation for rendering accurate sun angles.
3. Once your building(s) are located, place any building pads you need and make sure the elevations of your building(s) are where you want them. Now you're ready to share coordinates.
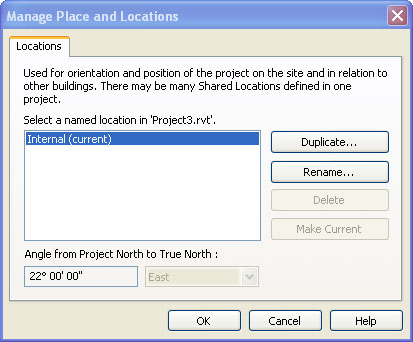
4. While in your site model goto Tools... Shared Coordinates... Publish Coordinates... and select your building(s) one at a time. This tool will share the coordinates of your site model (which is oriented correctly) with your imported building(s). Each building you select will require a named location. The default is Internal.
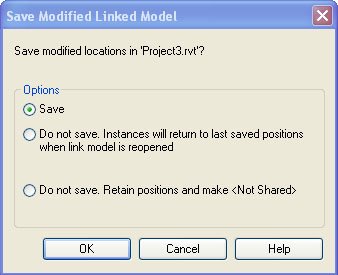
5. Save your site model. A dialog box will popup 'Save modified locations in 'Project.rvt' Go ahead and Save. You can also go to File... Manage Links... Revit... Save Locations. This procedure will open your linked model and save the new location into the linked project file but it won't affect any of your existing views in the building project file so not to worry.
6. Now that you have shared coordinates let's say you want the proper elevation to show in the levels of your building project file. While in your building project file just select a level... goto its properties... Edit/New... and change the Elevation Base parameter from Project to Shared.
7. We will often link the topography model back into the original building model for representing the topography accurately in sections and elevations. When you import the topography back into your building model make sure you Automatically Place... By Shared Coordinates. Your topography will import right where we want it to now that the two projects are sharing coordinates.

For more on Project Positioning see Steve Stafford's Revit OpEd.

Friday, October 13, 2006

Building Pad Tips

A building pad will cut the topography down or raise topography up to the elevation you need for cut and fill. The building pad tool does not allow for sloping pads yet. Here are a few tips for managing building pads.

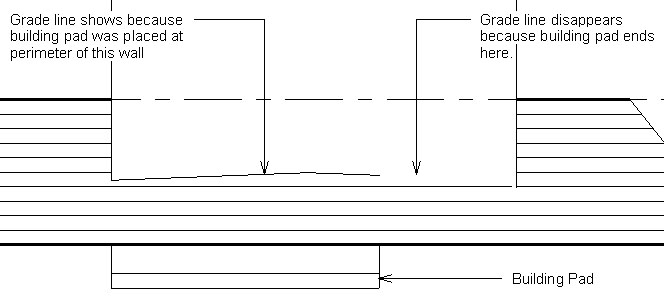
1. Let's say your grade slopes up to the building and you want to show (in your elevations) exactly where the grade meets the building. Well, Revit will not create this line for you and there is no way to join the geometry of a toposurface to a wall to get the grade line to show. So, you'll have to sketch a building pad along the perimeter of your building footprint to get the grade line at building footprint to show.

2. Now let's say you need several building pads at different elevations for your slabs on grade, crawlspaces, and basements. If these pads share edges you'll notice right away that if you overlap pads in the slightest bit you'll get the following error message: "Pads can't overlap (but can share edges)." My first try at multiple building pads with shared edges I learned a very important lesson (after hours of effort). Using the align tool to align edges of your pads so they can share an edge often doesn't work no matter how many hours you waste trying to align edges. So, rather than aligning edges when you have multiple building pads with shared edges do this instead... after you sketch your first building pad... copy the shared portion of your sketch to the clipboard... finish your sketch... move on to your next building pad... and paste the contents of your clipboard (shared edges) into your new building pad sketch. This method of copying shared edges from one pad and pasting them into the adjactent pad will save you hours of wasted effort trying to align shared edges of building pads that just won't cooperate any other way.

Hope these tips help you save hours of work trying to manage building pads.

Wednesday, September 27, 2006

Surveys and Site Plans

We quite often import survey data into Revit from DWG files given to us by the surveyor. Here are a few tips to consider when importing (and exporting) surveys.

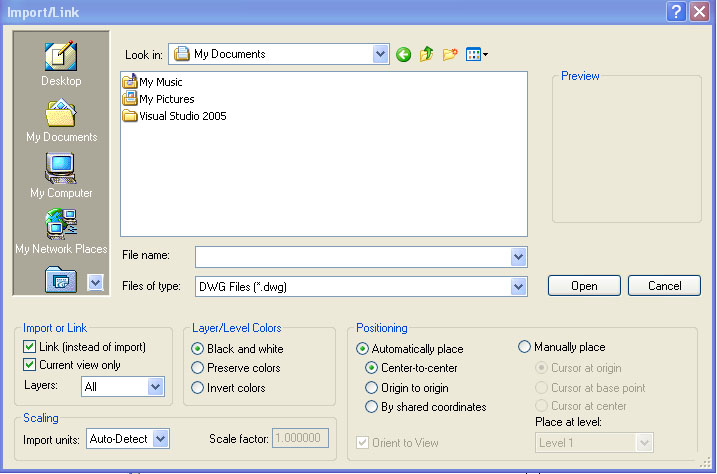
1. Under File... Import/Link... CAD Formats... If you check "Link (instead of import)" you're keeping the project file size smaller. If you want to import the survey later you can always Import under File... Manage Links.

2. If you check "Current view only" your survey will only show in the active view (similar to detail lines). If you uncheck "Current view only" your survey will be visible in all of your views... elevations, sections, 3D views, etc (similar to model lines) and you'll have to adjust its visibility one view at a time.

3. Now let's say you've developed your site plan (with linked survey) and you want to export the data (including survey) back to DWG format. If you go to File... Manage Links... and Import your linked survey then it will export with the rest of your model to DWG format. If you don't Import your survey you'll notice that only revit components will export. The survey needs to be a part of the Revit model or Revit won't consider it when exporting your site plan to DWG.

UPDATE (09/27/06):
In Revit Building 9.1, when a DWG or DXF survey file is imported with the Current View Only checkbox checked, you cannot select the DWG/DXF instance to create a terrain model from the instance like you could with 9.0 and earlier versions. So imported data to be used for creating a toposurface must be imported with the Current View Only checkbox cleared. Thanks to Wes Macaulay on AUGI for posting this issue. Doesn't look like Autodesk is going to change this behavior.