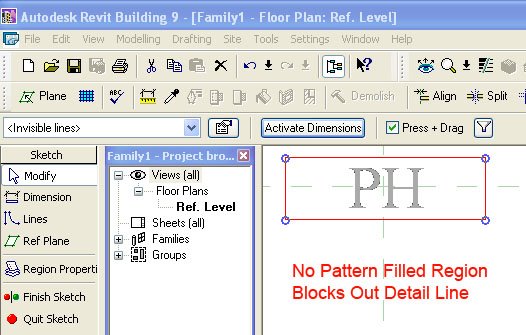
1. Type out the text you want in AutoCAD (at a height of say 6") and save as a DWG.
2. Goto File... New... Family... Detail Component and import your DWG into your new Detail Component.
3. Place a masking region behind your imported text (as shown).
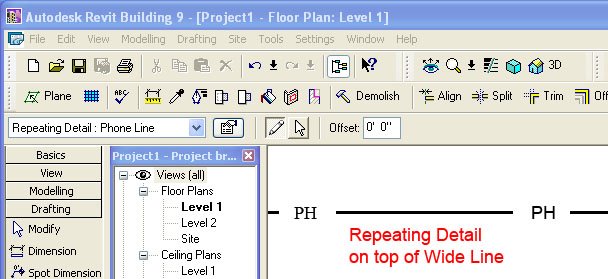
5. Goto Drafting... Repeating Detail... Properties... Edit/New... Duplicate... and give your repeating detail a name (phone line as an example). Set Detail Rotation to "90° Counterclockwise" and spacing to something like 10'.
6. Now draw a detail line in any view of your project. Draw your repeating detail over your new detail line as though tracing the detail line.

Combining repeating details and detail lines you now have a workaround for creating utility lines for gas, elec, phone, sewer, storm drain, etc. Daphne (one of our staff) suggested trying this.
3 comments:
This is exactly what I was looking for. Thanks!
So I just discovered... apparently you can also nest the same detail component into a baluster family and use the baluster family as part of a railing structure to represent utility lines.
Line Pattern with Text can be done by making a family. Look at the tutorial on youtube
https://www.youtube.com/watch?v=swR-zJkc1fQ
Post a Comment